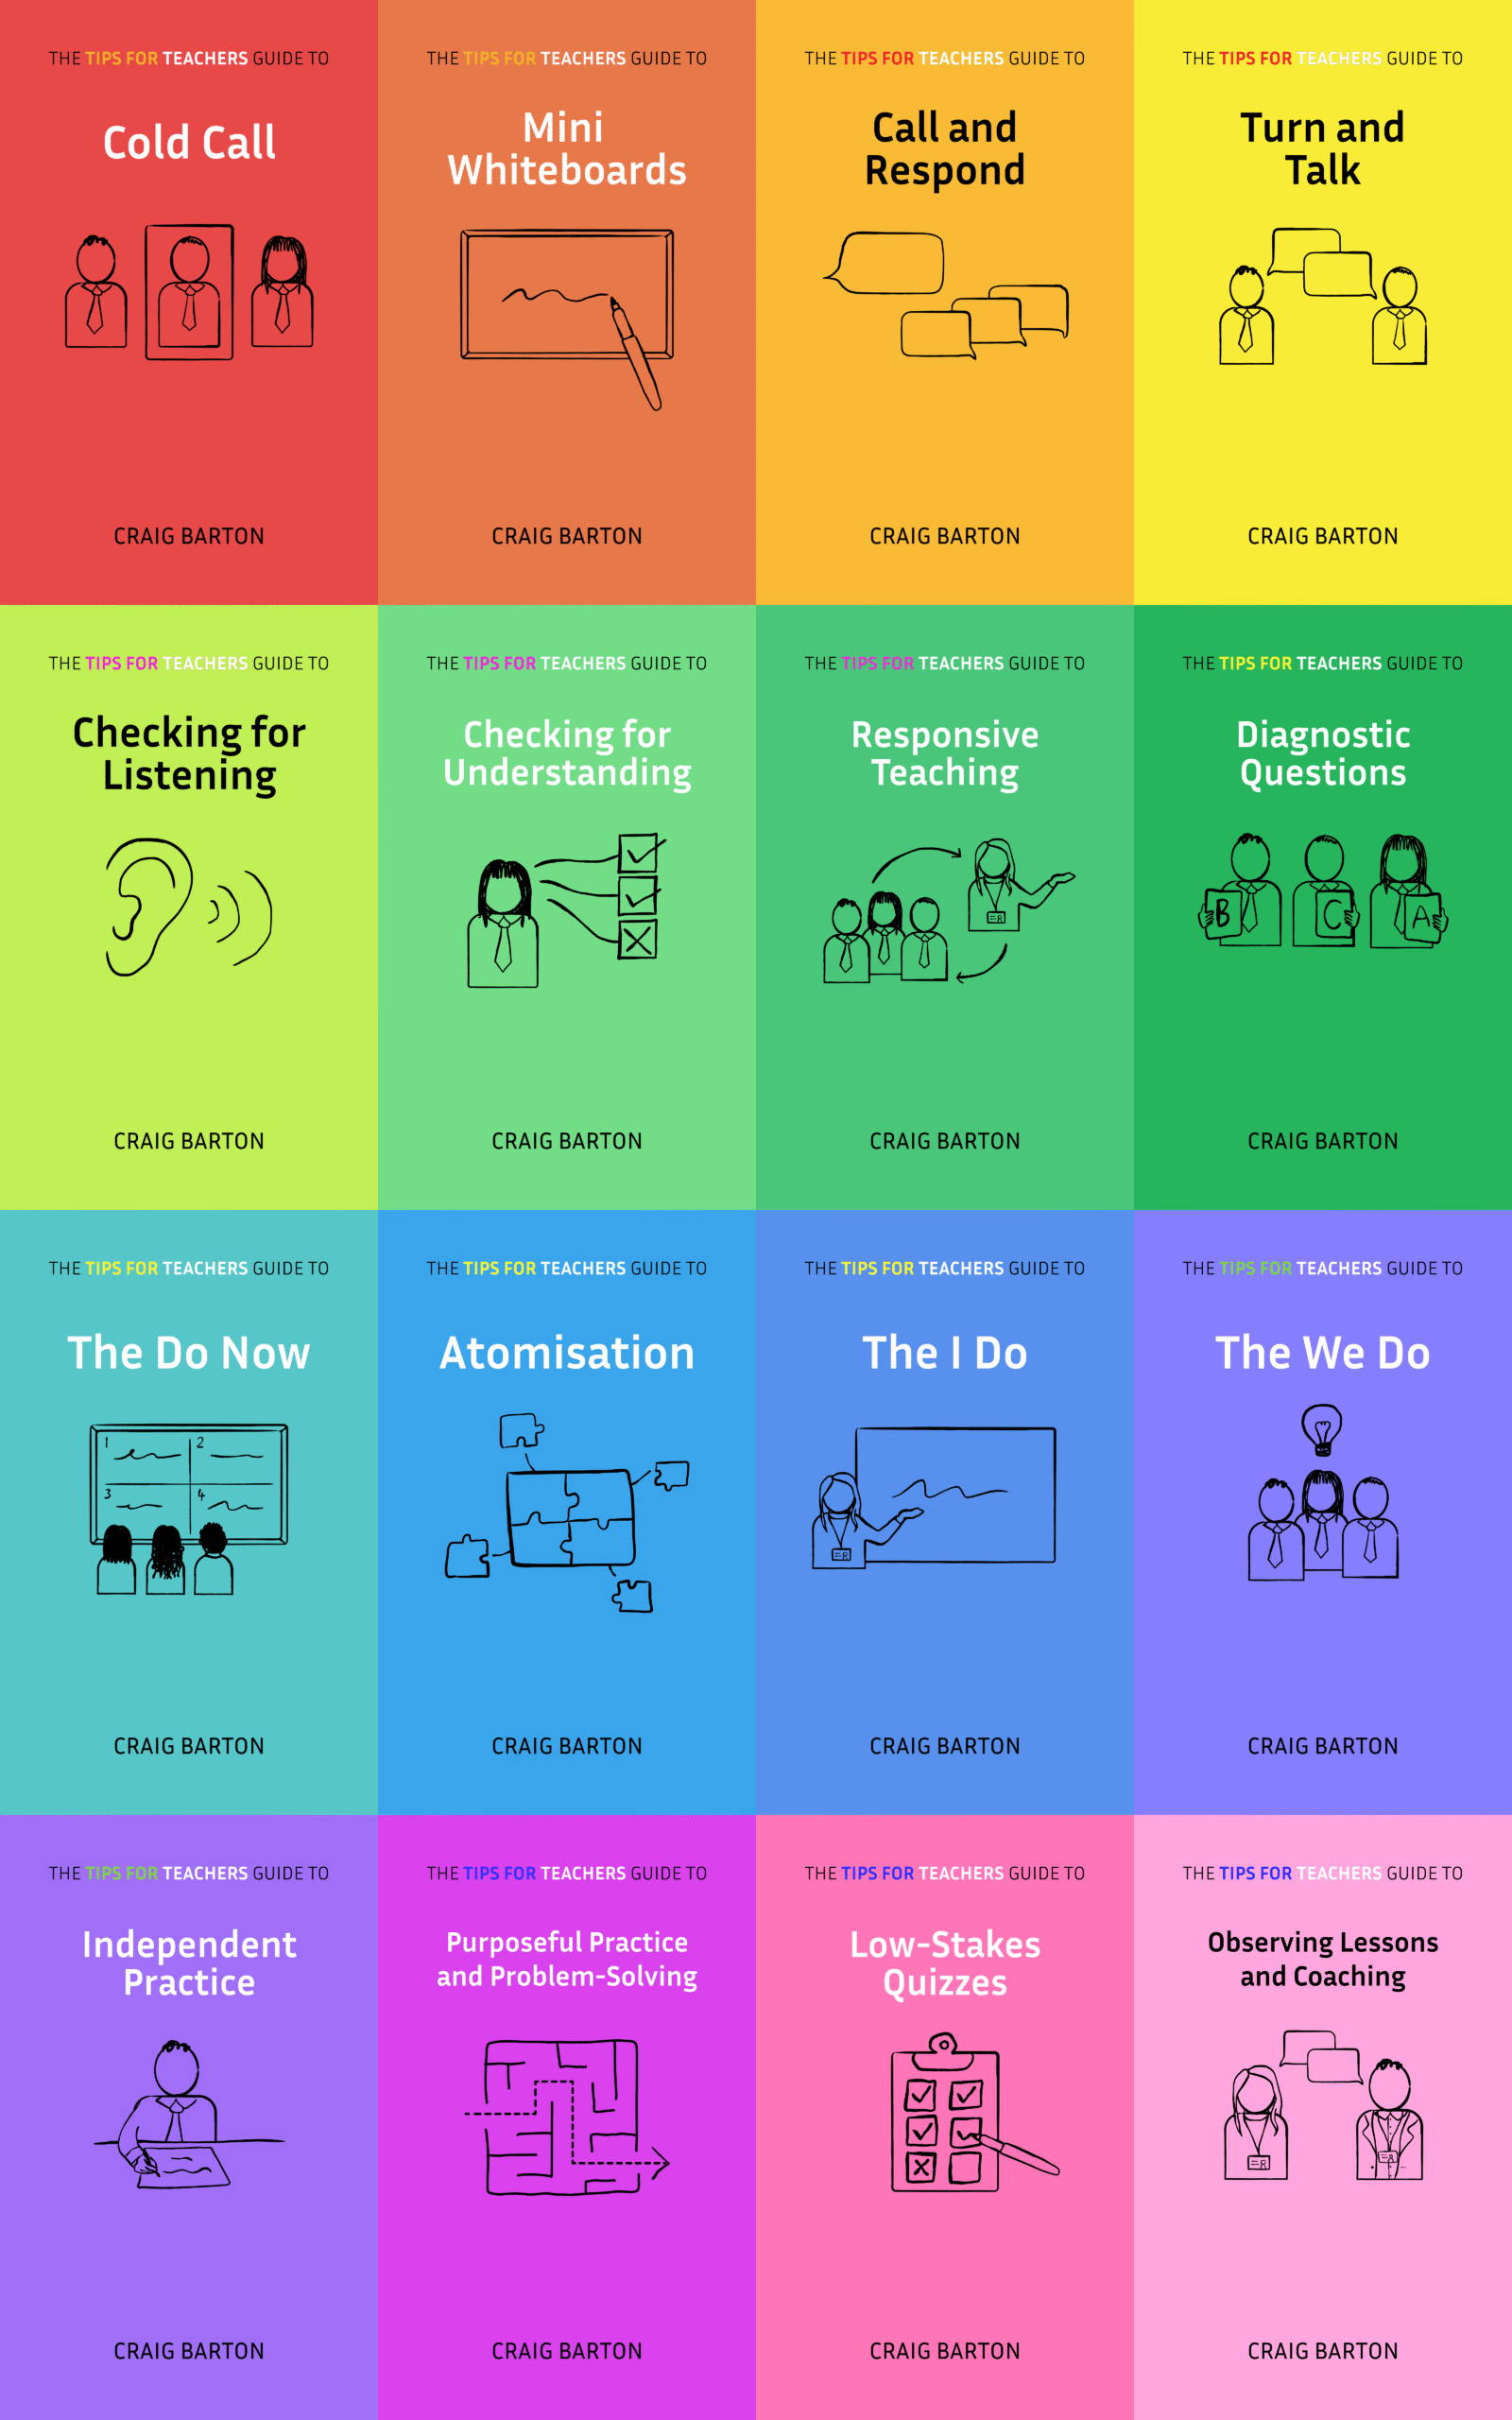
***You can purchase a book in paperback or on Kindle on Atomisation, or a 90-minute online workshop that you can share with colleagues at a CPD event or departmental meeting***
- Diagnosis
- Evidence
- Solution steps
- Warning, warning…
- What is Atomisation?
- Examples of Atomisation
- Why Atomise?
- Where does Atomisation fit into a Learning Episode?
- Step 1: Choose a good example
- Step 2: Break down the example into atoms
- Step 3: Star (*) any atoms that students have met before and plan questions to assess these
- Step 4: Teach any new atoms separately
- Step 5: Chain some atoms together
- Step 6: Teach the full routine
- Examples of Atomisation
- FAQs
- Want to know more?
- Implementation planning
- Book and 90-minute online workshop
Atomisation is fundamental to my planning process. I don’t want to build it up too much, but it has been a game-changer in terms of how quickly my students grasp new ideas.
Diagnosis
- How do you break down new ideas?
- What challenges do you face?
Evidence
I watched a teacher deliver a worked example on the Sine Rule:

His explanation was clear. He took students through the required steps – labelling the sides, setting up the formula, entering the numbers into the calculator, etc. Along the way, he checked students’ understanding of prior knowledge, such as how to rearrange a formula and round their answers.
This all sounds like good stuff.
But there were three problems:
- The worked example took ages. I timed it at 6 minutes 23 seconds.
- Students were confused. Some told the teacher they didn’t get it, and others sat there in silence with pained expressions on their faces.
- Very few students could answer the Your Turn correctly
I hypothesise that things went wrong because the teacher did not Atomise.
Solution steps
Warning, warning…
What follows is my attempt to distil a complex, intricate theory into something you can read in 30 minutes and apply in your classroom tomorrow.
I am indebted to the work of Kris Boulton, the UK’s leading expert on Atomisation. He would no doubt shudder and possibly vomit at the liberties and simplifications I make here. So, for the authentic take on Atomisation, I wholeheartedly recommend you check out Kris’ work, starting with my conversation with him here.
What is Atomisation?
I define Atomisation as follows:
Atomisation is the breaking routines down into their smallest constituent parts (atoms) that can be assessed or taught separately from the routine itself
If you are into Rosenshine’s Principles of Instruction, then Atomisation is Principle #2: Present new material in small steps but taken to the extreme.
Examples of Atomisation
To start, here are three procedures (or, in keeping with the language of Atomisation, what I will now call routines) that I have atomised. None of these routines have been perfectly atomised. But they all worked in the sense that all students could answer the We Do question and the Consolidation practice that followed. Having concrete examples early on of where we are trying to get to should help the following theory make more sense.
In each case, the routine is on the left, and the Atoms are on the right.
Example 1: Expanding double brackets

This routine consists of three atoms, each corresponding to a line of working.
Students have met Atoms 2 and 3 before, so they have a *. Anything students have met before will be assessed during the Atomisation phase.
Atom 1 is new, so it does not have a *. Anything students have not met before will be taught during the Atomisation phase. Crucially, they will be taught this Atom in isolation before it is used during the I Do.
Each Atom has a letter after it. This refers to the type of Atom. Here is the full list:
- Category (Cat)
- Comparative (Com)
- Fact (F)
- Transformation (T)
- Routine (R)
As we will see below, once you know the Atom type, you know the best way to teach it to students.
Notice, in this example, that there is only one new atom, so that is all we need to teach students before we put all the atoms together in the I Do that follows the Atomisation phase.
Example 2: Adding fractions

In this example, we have more atoms. Generally, the more steps in a routine, the more atoms. Notice also that there is not a 1-to-1 correspondence between the number of lines of working.
Notice in this example that there is only one new Atom to teach students before we put the routine together in the I Do.
Example 3: Solving quadratic equations using the quadratic formula

Here, we have lots more atoms.
We also have several Atoms that are new to students and hence need teaching. These will be taught one at a time, and in isolation from the routine itself. This reveals another key thing about Atomisation: it will take a different amount of time depending on:
- How complex the routine is (the number of Atoms)
- How many of those Atoms are new and how many are prerequisites (*), as teaching typically Atoms takes longer than assessing them
- How secure students’ knowledge of the * Atoms is —because if that knowledge isn’t secure, those Atoms need teaching.
As we discussed here, this is one reason why the unit of time when planning should not be the lesson, because it is hard to predict how long Atomisation will take.
Why Atomise?
From what we have seen so far, Atomisation may seem complex and unnecessary. Most lessons I watch do not have this phase. The teacher either:
- Dives straight into the I Do,
- Assesses prerequisite knowledge first, but then bundles together new Atoms in the I Do.
This almost always causes problems. The problems may become apparent during the I Do if the teacher asks the students questions, during the We Do when they check students’ understanding, or during the Consolidation phase when it becomes clear that student understanding is not as secure as the teacher believed. But the problems always come.
Let’s return to the example from above:

Think how many Atoms of knowledge students need to follow the I Do:
- Recall the sine rule
- Decide under what conditions to use the sine rule
- Label the triangle
- Substitute values into the formula
- Rearrange the formula
- Enter values into the calculator
- Find inverse sine
- Round answers
Some of these Atoms are new, some of them students had met before.
The teacher did not assess any Atoms students had met before, nor did he teach any new atoms separately. Instead, everything got chucked into the I Do melting pot.
What happened:
- The I Do took ages. Of course, it did because the teacher was trying to teach students each new atom, check their understanding of atoms they had met before, and show them how they all fit together.
- The students were confused. Again, of course, they were because they were trying to retrieve atoms they had met before, learn new atoms, and understand how all these atoms fit together. Cognitive overload was in full force.
- Most students could not answer the Your Turn question. They may have fumbled through the I Do, with one or two struggling to get the teacher’s desired answer with lots of scaffolding. But when asked to solve a similar question on their own, the true fragility of their foundations was revealed.
- Everyone felt pretty rubbish. The students’ confidence was rocked, and the teacher felt frustrated. Why didn’t his students understand?
We can do better than this.
During the I Do, we want everything my students see to be familiar, so their limited attention is focused on how familiar things fit together in an unfamiliar way. This gives students the best chance of understanding. Atomisation is most effective way to achieve this.
So, let’s learn how to atomise.
Where does Atomisation fit into a Learning Episode?
In a previous section, I shared my Building Blocks of a Learning Episode:

Atomisation comes after I have conveyed the purpose of what we are doing and before the I Do. Successful Atomisation sets up the teacher-led I Do that follows. It allows us to deliver a clear and concise explanation without needing to check for understanding, giving our students the best chance of attending to the sequence that the atoms fit together.
As we will see in the final section, it is sensible to atomise before each I Do rather than having one all-encompassing Atomisation phase at the start of the Learning Episode.
Step 1: Choose a good example
To make Atomisation effective, we need a good starting example to model during our I Do. This part of the planning process often gets little attention. Experienced teachers I work with tend to create examples on the spot, whereas less experienced teachers use whichever example is provided in the resources they have downloaded.
Research suggests that the choice of example can significantly impact student learning.
Here are some guiding principles.
1. Avoid repeating elements within a worked example
a) Avoid repeating elements in the question
Look at this equation from a recent lesson observation:

During the I Do, the teacher said:
Our first step is to add 2 to both sides of the equation.
But what 2 is the teacher talking about? Sure, the teacher gestured and labelled, but the potential for ambiguity and confusion is not worth the risk.
Or how about this percentages question with the repeated 5:

Finally, look at this choice of I Do on rounding decimals:

Again, we have a proliferation of 5s. This confused the students when it came to the We Do:

b) Avoid repeating elements in the answer
Here is an innocent-looking sequence:

But look at the answer:

Does the fact that the sequence goes up in 4s determine the coefficient of n or the constant term?
Finally, look at this question a teacher used:

Everything seemed fine until a student worked out the answer (132º), and said:
Ah yes, it is the same because of opposite angles.
No, no, no!
2. Ensure students’ attention is on the core concept
What students think about is what they will remember. So, when introducing students to a new concept, we must ensure as much of their attention is dedicated to the new concept as possible.
Take a look at this example:

Students could not dedicate attention to the relationships between the angles because all their attention was taken up processing the arithmetic:

Later in the lesson, students mixed up which angle relationship was 180° and which was 360°.
Take a look at this one:


We can see from the student’s mini-whiteboard that instead of thinking hard about inverse operations and deciding the correct first step to solve an equation – which the teacher wanted students to think about – their attention was sapped up doing the arithmetic.
There are two things teachers can do to avoid this when choosing their example for the I Do:
- Keep the numbers simple
- Give students a calculator
3. Start with general examples, not “easy” examples
Keeping the numbers simple does not necessarily mean keeping the question simple.
Most teachers start with an easy initial example for the I Do and then expose students to more complex examples during the Consolidation phase. There are three issues with this:
- Students could get them right for the wrong reasons (ie they take dodgy mental shortcuts)
- Useful secrets are hidden
- You have to teach a different method for more challenging examples
This is all very abstract, so let’s look at some examples to make things more concrete.
Example 1

Two-squared should be made illegal as a starting example when teaching powers. You can arrive at the correct answer of 4 by adding the numbers, multiplying the numbers, or using the correct method. Hence, you can get the correct answer for the wrong reasons. Three-squared is a tougher calculation, but it makes it crystal clear what process is taking place.
Example 2

The left-hand example has several issues when used as the initial example for expanding double brackets.
- It is not crystal clear where the x-squared term comes from in the resulting answer. If students have loads of examples like those, they may realise that the answer always starts with an x-squared and not realise that multiplication is taking place.
- The constant term is 5. Is this because the second term in the first bracket is 5? Again, the process of multiplication is hidden.
- Students may end up seeing the example on the right as a different type of question and, hence, not see the questions between the two.
If you are careful with the numbers, starting with the example on the right makes it clear that multiplication is the operation to arrive at each of the terms in the expansion. Once students are comfortable with this, you can use the example on the left as a special case.
Example 3

After several examples like the one on the left, students stop thinking about the concept of the area of a triangle and instead go into autopilot, multiplying the two numbers they see and halving the answer. In fact, the example on the left has an additional problem: Students might think the area is just the height.
The right-hand example requires students to think hard about which two numbers are needed and then calculate them. If students are not secure with their times tables, the numbers may need simplifying.
Example 4

10% is often the default start when teaching a percentage of an amount. And what do teachers often say? To find 10%, we divide by 10. So, how do we divide by 20%? Divide by 20?
Instead, if we want to start with factors of 100%, 25% is a better starting point. Or, we can jump right in and start with 17% and teach the factors of 100% later as special cases.
Example 5

A cube has six identical faces. If this is our initial example when teaching surface area, the process of identifying each face and its dimensions is lost. It is better to start with a cuboid or a pyramid.
Example 6

When teaching enlargements from a point, teachers often start with the centre of enlargement at (0, 0). The issue here is that you have a convenient shortcut to work out the new coordinates—just multiply them by the scale factor. Hence, all thoughts about the actual concept of enlarging from a point go out of students’ minds.
It is better to start with a more general point and then introduce (0, 0) later as a special case.
To reiterate, we are not deliberating about making the examples more difficult than they need to be. It is still essential to keep the arithmetic simple so that as much of our students’ attention as possible is focused on the process. However, by starting with a carefully chosen “general” example, we better set our students up for future success.
4. If you do multiple examples, only vary one critical feature per example
Often it makes sense to model two examples to students’ during the I Do. In these cases, varying one critical feature between examples helps students make connections.

On the left, everything changes between the first and second examples. On the right, only the denominator of the second fraction changes, so students can track what impact that change has on each step of the solution.
Step 2: Break down the example into atoms
Once we have chosen the example to use during the I Do, the next step is to break that example down into Atoms.
The best way to do this is to take a piece of paper, write the example and the working out on the left-hand side:

Then ask yourself: What knowledge do students need to get from one line to the next?
Each piece of knowledge becomes an Atom:

This takes practice. As we shall see later, some Atoms are invisible in our working. But, the more you do this, the better you will become. Better still, do this with a colleague, both listing your atoms to the same example independently and then comparing the results.
Step 3: Star (*) any atoms that students have met before and plan questions to assess these

These Atoms are the prerequisite knowledge.
Research suggests that assessing these Atoms before we teach a new idea has two benefits:
- Identifying gaps in student understanding. We can identify gaps in prerequisite knowledge and support students to fill them.
- Improving student learning. As a result, students head into the I Do that follows with a secure foundation upon which we can help build new ideas.
I will add an additional benefit to assessing prerequisite knowledge: It frees us up to deliver a clear and concise teacher-led I Do. We do not need to break the flow of our explanation by checking for understanding of prerequisite knowledge because we have already done it. Our attention and our students’ attention can be on how our existing knowledge, which they are secure with, fits into the new idea we are teaching.
The best way to assess the * atoms is to have one question per slide.
Make the question as relevant to the planned example as possible. So, for the atom Substitute into a formula, there is little point in assessing a formula structure that students will not use. So, thinking about the area of a triangle, a better question would be this:

Give the students, say, 10 seconds in silence to write their answers on their mini-whiteboards. When ready, hover the boards face-down, and show in 3, 2, 1…
Then we need to respond.
If 80%+ of students get the answer correct, confirm it, write it down, and proceed to the next question.

If we do not hit that 80% figure, we need to explain and then recheck for understanding with a carefully chosen follow-up question:

If students are still struggling, we need to spend longer explaining and rechecking, as there is no point in continuing with a new idea built upon these foundations.
Step 4: Teach any new atoms separately
Just as we don’t want to assess Atoms during the I Do, we also don’t want to teach new Atoms during the I Do. We want students’ attention to be on how familiar Atoms fit together.
Therefore, if an Atom is new to students, we will teach it independently and in isolation from the I Do built upon it.
Before we go any further, a key point. If your version of Atomisation consists of:
- Choose a good example
- Break down the example into Atoms
- Assess any Atoms students have encountered before
- Teach any new Atoms individually and before you combine them in the I Do
Then, you will reap 80% of the benefits. Doing those four things will put your students in a strong position to learn the new routine built upon those atoms. So start here and make this part of your regular practice.
What follows is a bonus. It gets pretty technical and requires a fair bit of thought. Don’t attempt this until you have successfully embedded everything so far in this section.
***
For those of you still with me, let’s take an Atomisation deep-dive…
General principles for teaching atoms
We can improve the examples we choose to teach the new atoms by using the following principles from research into Direct Instruction.
1. The wording principle. To make the sequence of examples as clear as possible, we should use the same wording on all items (or wording as similar as possible). This minimises distractions and helps students focus on key details.

I often see teachers switch the language they use during a sequence of examples. One example is changing between minus, subtract, and takeaway almost arbitrarily.
Of course, the students must understand any words we choose to use in our sequence of examples. In the example above, if the purpose is to communicate what an imprpoer fraction is, we are fine to say the following:
- For 3/2: The numerator is greater than the denominator
- For 2/3: The numerator is less than the denominator
But only if our students understand the terms numerator and denominator. If they don’t, then this unfamiliar language will interfere with their understanding of improper fractions. Two solutions to the problem are removing technical vocabulary from our sequence of examples, or teaching technical vocabulary as a separate atom before using it in this sequence.
2. The sameness principle. To show the range of variation of the concept, we should juxtapose examples of the concept that differ from one another as much as possible yet still illustrate the concept and indicate that they are the same.


Multiple positive examples are important for building students’ understanding of a concept. However, some positive examples are more useful than others. Maximally different positive examples show the full range of a concept.
In the first example, the dog breeds chosen differ in terms of size and looks. In the second example, various instances of “under” are shown—some erasers close to the table, others farther away, some centered, others near the edges. Despite these differences, the labels remains the same, reinforcing that size or position changes do not alter the meanings of “dog” or “under.” Dylan William refers to such positive examples as “only just” examples, pushing a concept to the very edges of its limits.
So, in maths, when intruding fractions to our students, instead of starting with nice, tidy unit fractions such as 1/2, 1/3, and 1/4, we should also show them improper fractions with crazy numerators and denominators, such as 2765/32, along with mixed-number fractions.
3. The setup principle. Examples and non-examples selected for the initial teaching of a concept should be as similar as possible, differing only in the critical feature.

Non-examples are essential to understand a concept. Only by seeing what something isn’t can we truly appreciate what it is. But some non-examples are more useful than others. A non-example should be almost identical to a positive example, differing only in the defining feature; otherwise, students might focus on the wrong thing. So, the sameness principle is about maximally different positive examples, whereas the set-up principle is about minimally different negative examples.
In the example above, we do not want students to focus on the change in shape or colour, just on the change in position. Dylan Wiliam talks about “near misses” in the context of non-examples – in other words, they would have been positive examples had it not been for the single feature that changed. This allows students to attend to that feature and its impact.
4. The difference principle. To illustrate the limits or boundaries of a concept, we should show consecutive examples and non-examples that are similar to one another except in the critical feature and indicate that they are different.

As well as the choice of non-example, the sequencing also matters. Going from a positive example to a minimally different non-example draws students’ attention to the change. In set A above, two examples are shown with minimal differences in orientation, making the contrast easy to grasp. However, in set B, the same examples appear but are separated by other items. Without direct comparison, the key difference is less obvious, and the learner may fail to recognize the defining feature. Juxtaposition ensures that critical distinctions are immediately noticeable, reinforcing accurate concept formation.
Along with the accompanying positive examples, these minimally-different, juxtaposed negative examples help to define a concept’s boundaries.
5. The testing principle. To test for acquisition, we should juxtapose new, untaught examples and non-examples in random order

Following a sequence of examples and non-examples, we need to see if our students have understood, so we need to ask them some question. But the order we present these questions matters. If students answer our questions correctly, we need it to be becuase they have understood the concept, and not becuase they are pattern spotting.
Putting it all together
Here is an example from Englemann and Carnine’s Theory of Instruction that illustrates the application of these four key principles:

Englemann and Carnine write:
- Each example involves a space (diagrammed as a line with a marker at either end).
- To present the sequence above, hold your hands about a foot apart and say “Watch the space.”
- Then hold your hands stationary and say the wording for example 1: “It didn’t get wider.
- Move one hand in slightly, stop, and say the wording for example 2: “It didn’t get wider.”
- Move the same hand out slightly. Then say the wording for example 3: “It got wider.”
- Continue in this manner for the remaining examples.
Instruction and Testing Sequences
When teaching students Atoms, we begin with an Instruction sequence and progress to a Testing sequence.
We can see the Instruction sequence in examples 1 to 5 below, and the Testing sequence in examples 6 to 13.
The Instruction sequence is teacher-led. As we will see, Category atoms consist of around five examples, whereas Transformation atoms may be one or two. Crucially, the Instruction sequence is short. The teacher presents each example in turn, saying few or no words of explanation.
Then, we progress quickly to the Testing sequence. Here, we need data from each student to determine whether they have followed what we have just presented. Mini-whiteboards are the key here, allowing every student to respond immediately.
There are only two possible reasons students get a question in a Testing sequence wrong:
- They have not been paying attention
- The Instruction sequence is poorly designed
Hence, when I conduct a Testing sequence with students, I always say the same thing: If you get it wrong, as long as you have been paying attention, it is my fault, not yours. So, please give each question your best effort.
This lowers the stakes for students, thus increasing the size and quality of the data I collect after each example and allowing me to respond accordingly.
That response follows my model of responsive teaching. I keep pushing the Testing sequence with more complex, carefully varied examples until fewer than 80% of students have the correct answer. At that point, I will either:
- Teach the correct answer, re-test for understanding with a different example, and continue the sequence
- Stop the sequence and move on to the next Atom if we have progressed to a sufficient complexity
Different types of atoms
There are five different types of Atoms:
- Category (Cat)
- Comparative (Com)
- Fact (F)
- Transformation (T)
- Routine (R)
Once you know the Atom type, you know how best to teach it.
Category atoms (Cat)
If you ask the question: “Is this a ___?” and the answer is either Yes or No, then you have a Category Atom.
Technical language is always a Category Atom. Examples include:
- Is this…a prism?
- Is this… an equation of a straight line?
- Is this… an alternate angle?
- Is this… equation balanced?
Decisions are also Category Atoms. Examples include:
- Do I use Pythagoras to solve this problem?
- Is y the subject of the formula?
- Is this answer feasible?
- Is this the perpendicular height?
Decisions often get missed during the Atomisation process because they do not appear in the lines of work. As experts, we make such decisions without much thought, yet they can be stumbling blocks for our students.
The best way to teach Category atoms is via a sequence of related examples and non-examples.
Building on the general principles for teaching Atoms discussed above, Kris Boulton suggests introducing Category Atoms to students in the Teaching Sequence using NPPPN. That is:
- Start with a non-example
- Vary one thing to generate a positive example
- Show a maximally different positive example
- Show another maximally different positive example
- Vary one thing to generate a non-example
Occasionally, I will need 6 examples, which will be in the form NPPPNN. Here, I use three non-examples as there are three critical features I want to draw students’ attention to.
Let’s look at an example.
Imagine I am teaching students to understand the term polygon. This is a Category atom as you can ask the question: Is this a polygon?.
I want to establish three things during the Instruction sequence: Polygons cannot:
- Be open
- Have curved lines
- Be 3D
So, I follow NPPPNN
I present each example in the sequence to students one at a time on the board, saying as little as possible, letting the examples do the talking.
The sequence begins:

I pause for a few seconds, and then say, “This is not a polygon.” I do not say any more, and my students sit in silence.
I then use PowerPoint’s morphing feature, or rub out a line, to change the first example into this:

I leave the new shape visible for a few seconds to allow my students to reflect on my change, and then say: This is a polygon. No further explanation and no talking or questions from my students.
Next, we have another positive example, this time with several key features changed:

This is a polygon.
This sequence continues in the same vein until we have:

Here is my thinking, using the five principles above:
- Example 1: Non-example to show polygons cannot be open
- Example 2: Minimal change to show they can be closed (and do not have to be regular)
- Example 3: Maximal change to show another positive example, conveying that polygons can have more than four sides, can have reflex angles, and can be coloured in
- Example 4: Maximal change to convey that polygons can have as few as 3 sides
- Example 5: Minimal change to convey that polygons cannot have curved sides
- Example 6: Minimal change from example 4 to convey that polygons cannot be 3D
Let’s look at another example from a different area of maths.
Here is an Instruction sequence I put together to teach the Atom: What is a quadratic equation? See if you can see the logic behind my choice of examples and non-examples:

Here is one from Kris Boulton to teach: What is a bearing?

- Minimal difference from first negative to first positive (examples 1 and 2) – only changes the direction of measure – Difference principle
- Maximal difference for the three positives, showing the range of what a bearing can be – Sameness principles
- Minimal difference from fourth and fifth example, positive to negative – no longer measured from north – Difference principle
Here is an Instruction sequence to teach students the Atom: Are these fractions in a form ready to be added?

This is an example of a decision. Notice how this would not show up in any lines of working, and so might remain invisible and inaccessible to our students Atomisation helps make decisions explicit and noticeable.
Notice also in the fraction and quadratic sequences above how complicated we can make the examples look, and yet by following the five principles shared above, we can almost guarantee students will follow them. Hence, students feel smart and successful.
After any Instruction sequence, we need data from our students to see if it has been successful. All Instruction sequences look great until their first exposure to actual students.
So, now comes the Testing sequence. This consists of showing students a selection of examples and non-examples one at a time and challenging them to categories them.
There are no set rules for what this Testing sequence should look like, but here are two guiding principles:
- Include examples from a wide enough domain as students will need to draw from in the Learning Episode (The Sameness principle)
- Ensure you do not use a predictable sequence of examples and non-examples, such as NPNPNP… or NPPPN as students may get the answer correct for by pattern-spotting (The Testing principle)
Of course, we need a reliable check for understanding, so get all students to respond to the Testing sequence using mini-whiteboards. Because Category atoms have a yes/no answer, thumbs up or down also works well.
If at any point we fail to hit the 80% threshold suggested on our model for responsive teaching, either:
- Pause, model, re-test with another example
- Stop the sequence if enough examples have been covered
In addition, we can use the Give an Example of structure for Learner Generated Examples for an additional check for understanding:

Students can check the work of their partner, ticking those examples they agree with, adding a question mark to those they are not so sure about, and we can discuss those examples as a class.
Comparative atoms (Com)
An atom is a comparative if you witness change by observing before and after.
Examples include:
- Speed
- Gradient
- Density
We can employ the same principles above to teach Comparative atoms. We need a carefully sequenced set of examples with one key feature varying each time.
Two positive examples, followed by two negative examples, works well for Comparative Atoms (PPNN).
Here is an example from the primary maths classroom to teach the Atom: What is one more? Again, these would be presented one at a time, with the change highlighted by either adding more or rubbing out.


Facts (F)
Facts are things students need to remember. Facts connect concepts together. Crucially, the concepts in the Fact Atom must be understood – they will be Category or Comparative Atoms.
Examples include:
Formula:
- Area of a triangle
- Quadratic formula
Theorems:
- Angle at the centre
- Pythagoras
Properties:
- Multiplication is commutative
- Angles in a triangle add to 180
I like to teach Fact Atoms using Call and Respond, specifically my Explain-Frame-Reframe, Rehearse structure:
- Explain: The formula for the area of a triangle is base multiplied by perpendicular height divided by two
- Frame: The formula for the area of a triangle is…
- Reframe: Base multiplied by perpendicular height divided by two is…
- Rehearse: Take turns to say this fact with your partner
Transformations (T)
Transformations occur when an input is changed to an output in an obvious way. If it is not obvious, then the Atom is a Routine.
This table should help illustrate the difference:

Once again, we can employ the general principles to improve the sequence of examples we use:
- During the Instruction sequence, between one to three examples of the transformation are usually enough
- Each new example should change just one thing you want to draw students’ attention to. Again, the key to this is rubbing out the change and only the change.
- Where possible, let the examples do the talking
- In the testing sequence, use minimal changes, but also build in some re-sets where lots of things change
- Progress to ever-greater changes throughout the expansion sequence, which is essentially extension questions at the end of the testing sequence
Here are the three examples I use when teaching students the Atom: Break-up double brackets:

Then by the end of the testing sequence, you can give students examples like this, and typically they will get them correct:

Here is a video example from some work I was doing with 4 and 5-year-old students:
Routines (R)
The final Atom type is not really an Atom at all. But Routines can be Atoms in other Routines:
As we saw above, Routines are like Transformations in that they change an input into an output, but this time, the change is not immediately obvious.
Because of this, we are unlikely to be able to teach Routines with two or three relatively quick examples presented with little teacher talk.
Instead, routines are taught using the I Do, We Do approach, which you can find in later sections.
Before we move on, I want to reiterate my earlier point. If all this stuff about labelling and teaching atoms in fancy ways feels too much, please don’t worry. If you choose a good example, break it down into atoms, assess the ones students have met before, teach the new ones (however you want), and then put them all together in the I Do, you will reap substantial rewards.
Step 5: Chain some atoms together
Recently, I saw an example of Atomisation not quite working, and I thought it was worth further exploration.
The lesson
The objective of the lesson was for students to be able to plot straight-line graphs from an equation by filling in a table of values like this one:

The atoms
The teacher had identified that his students needed to be secure with the following Atoms to complete this process successfully:
- Reading algebraic expressions
- Substituting into formulae
- Multiplying with negative numbers
- Adding and subtracting with negative numbers
- Plotting coordinates on a set of axes
What happened
The teacher assessed each of the atoms with well-chosen questions, and students were able to answer them successfully. So, he moved on to the new routine – filling in a table of values – which used each of these atoms.
He asked his students to think of the value of y when x equals -3.

And his students couldn’t do it.
Suddenly, 2 x (-3) = 6, or (-6) + 2 = -8, despite no students making these mistakes some 30 seconds before.
Why had this happened?
In the coaching session, we discussed why. We hypothesised that the jump from answering questions on individual atoms to carrying out a process involving these atoms combined (interpreting algebraic expressions, substituting, multiplying negative numbers, and adding negative numbers) was too much for these students.
We should have chained some of these atoms together before tackling the process—and I take full responsibility here, as I delivered CPD on atomisation the last time I visited the school.
So, following on from questions like 3 x (-5) and (-4) + 3, we should have included some questions that combined these two atoms and these two atoms alone, such as 2 x (-3) + 1. Students could then have focused on these two atoms without extra attention needing to be diverted towards thinking about the other atoms, such as interpreting expressions and substitution.
Once the chaining of those two atoms was secure, more atoms could be added to the chain until students completed the whole routine.
What I learned
The whole point of Atomisation is to help students thrive with a multi-step process. But my mistake was assuming that the leap from nailing individual atoms to being able to chain every atom together to complete the multi-step process was a small one. If there are several atoms, a more sensible approach is to teach or assess two or three atoms individually and then chain those together. Once students are secure with that chain, teach or assess more atoms and add those to the chain.
Obvious, maybe. But I certainly missed it!
Step 6: Teach the full routine
Once you have completed the assessment of Atoms students have met before, the teaching of new Atoms, and any necessary chaining, you are ready to teach the routine built upon these foundations.
To do so, we will use the I Do, We Do framework in the next two sections.
Examples of Atomisation
Here are some examples of Atomisation from my school visits and commentary on some of the Atoms.
Routine: Rotate an object around a centre of rotation
- What is rotation? (Cat)
- In the Instruction sequence, the teacher shows a sequence of transformations, highlighting which ones are rotations and which are not.
- Read coordinates in all 4 quadrants (T)*
- Plot coordinates in all 4 quadrants (T)*
- Know clockwise and anticlockwise (T)
- In the Instruction sequence, the teacher uses the visualiser and tracing paper to show a selection of turns, highlighting which are clockwise and which are anticlockwise. In the Testing sequence, students vote thumbs up for clockwise and thumbs down for anticlockwise.
- How many degrees? (T)
- Again, under the visualiser, armed with some tracing paper, the teacher demonstrates quarter and half-turns in the Instruction sequence, telling the students how many degrees. Students respond to the Testing sequence using mini-whiteboards.
- Chunk Atoms 4 and 5 together (T)
- In the Instruction sequence, the teacher rotates an object under the visualiser and tells the students the degrees and the direction. In the Testing sequence, students respond on mini-whiteboards.
- Trace around an object (T)
- In the Instruction sequence, the teacher demonstrates under the visualiser. In the Testing sequence, students peer assess their partner’s attempt.
- Physically rotate tracing paper by keeping the centre of enlargement fixed (T)
- In the Instruction sequence, the teacher demonstrates, under the visualiser, rotating an object drawn on tracing paper 90 or 180 degrees clockwise or anti-clockwise but not then drawing the image. In the Testing sequence, students peer assess their partner’s attempt.
Routine: Drawing a pie chart (non-calculator)
- Recognise a pie chart (Cat)*
- Recognise frequency and total frequency from a frequency table (T)*
- Recall the angles in a full turn (F)*
- Factor pairs to 360 (T)*
- Calculations such as 90 x _ = 360
- Find the numerator of equivalent fractions with 360 as the denominator (T)*
- Calculations such as 13/40 = ?\360
- Reading scales on a protractor (T)*
- Given an angle and a protractor correctly positioned on the board, determine the size of the angle by reading the correct scale
- Estimating the size of angles (T)*
- Ensuring students can distinguish between acute and obtuse angles so they can check the sector they draw is roughly the correct size
- Draw an acute angle with a protractor (T)*
- Even though this is prior knowledge, we decided the teacher would do one model
- As this is not suited to checking using a mini-whiteboard, students check each other’s work. This means they get extra practice measuring angles. Any examples of disagreement can be put under the visualiser.
- Draw an obtuse angle with a protractor (T)*
- Same as above
- Draw two connected angles with a protractor (R)*
- This is an Atom that is often missed and is a key reason students go wrong when drawing pie charts – they are fine drawing the first sector but then go wrong when drawing the second connected to it.
- Again, we decided the teacher would do a model of this, and then students would check the work of their peers
Routine: Calculate the surface area of a prism
- Calculate the area of a rectangle (R)*
- Label all four sides to increase the challenge
- Lengths in cm
- Calculate the area of a triangle (R)*
- Use a non-prototypical example and include redundant lengths
- Lengths in mm
- Calculate the area of a circle (R)*
- Give the diameter
- Lengths in m
- Count the faces of a prism (T)
- We decided to separate counting the faces from identifying the shape of the faces
- Name the faces of a prism (T)
- Identify missing dimensions from prisms (T)
- Given a prism with some lengths labelled, deduce the length of an unlabelled side
FAQs
How long does Atomisation take?
It really does depend. If there are not many new Atoms and the checks for understanding reveal that students are secure with the Atoms they have met before, it could take a few minutes.
However, if there are many new Atoms, or the checks for understanding reveal gaps in students’ knowledge, it will take longer – perhaps a full lesson, or even more.
But that is okay. Our Learning Episode Structures are not lesson structures. They are designed to last several lessons if needed. The only alternative is not to atomise – to cross our fingers and hope some miracle occurs, and our students follow every aspect of a novel procedure built upon shaky foundations.
Also, the more we Atomise, the larger the bank of Atoms that we have explicitly taught to students we build up. Atoms are very rarely unique to an idea. So, once students have been taught an Atom well, it becomes an * Atom in a future idea or Learning Episode that can be quickly assessed rather than taught.
Atomisation is time well spent.
What about differentiation?
I often get asked whether Atomisation looks different for top sets versus bottom sets studying the same procedure. My answer is: No.
I would typically give students from all classes the same examples and, hence, use the same list of Atoms.
I would then assess any Atoms that students had met before.
I wouldn’t assume that students must remember a certain Atom just because they were in the top set. If they can, that’s great. The assessment takes a few seconds, and the students experience a moment of success. And if they can’t, then it is a good job I have assessed their understanding.
Likewise, I wouldn’t assume that a class could not remember a certain Atom because they are in a lower set. They may not, but I can support them. Or they might surprise me, in which case I would have saved time.
I would also teach each of the new atoms in the same way. As we have seen, the Atoms are so focussed, and the teaching is so quick, that differentiation is rarely needed.
Likewise, I would respond to the data in the same way. If 80%+ of students have the correct answer, I will move on. If fewer than 80% do, I will stop, intervene, and reassess.
Typically, I have to explain and reassess more with a lower-achieving class than with another, but not always. However, the data determines whether Atomisation plays out differently from class to class, not my assumptions.
Atomisation is for everyone.
Do I atomise per worked example, or Learning Episode?
Here is a lesson structure I see a lot:

The teacher atomises at the start of the lesson, or sequences of lessons instead of per I Do-We Do.
When this happens, one of two things usually goes wrong:
1. Students struggle on an Atom that is not needed until later
The teacher includes atoms for all the I Dos in one batch, and students struggle with an atom that is not needed for the first I Do, but is needed for a later I Do. The teacher feels obliged to deal with this atom there and then, which takes time and interferes with the preparation for the first I Do.
2. The teacher forgets to include an Atom that is needed later
The teacher forgets to include something in the Atomisation that is needed for one of the later I Dos, and only discovers this knowledge is lacking when they are in the middle of the explanation
This happened with a lesson I saw on standard form. The teacher atomised and assessed those atoms students needed for dealing with positive powers of 10 at the start of the lesson:

As a result, students could follow the I Do:

And nail the independent practice:

But later in the lesson, when the teacher moved onto negative powers, she did not do a prerequisite knowledge check, and instead jumped straight into the I Do:

To understand this, students need to be secure with negative powers of 10. But this had not been assessed. When I later checked students ‘ understanding of this, it was not secure:

The solution is to Atomise before each I Do, checking if any new Atoms need teaching and if any of the Atoms from previous routines need reassessing.
Want to know more?
Kris Boulton is the main man when it comes to all things Atomisation. As he produces more content, I will link to it here:
- Our original conversation about Atomisation
- Kris’ conversation with Zach Groshell
- Atomisation in Action – ep1
- Atomisation in Action – ep2
Implementation planning
Here are the ideas we have discussed:
- Step 1: Choose a good example
- Step 2: Break the example down into atoms
- Step 3: Star (*) any atoms that students have met before and plan questions to assess these
- Step 4: Teach any new atoms separately
- Step 5: Chain some atoms together
- Step 6: Teach the full routine
- Atomise per worked example, not per lesson
Use these ideas to complete the prioritisation exercise here.

Book and 90-minute online workshop
***You can purchase a book in paperback or on Kindle on Atomisation, or a 90-minute online workshop that you can share with colleagues at a CPD event or departmental meeting***